Showing posts with label critique. Show all posts

Tuesday, January 17, 2017

4th Grade: Landscapes


Student landscape example
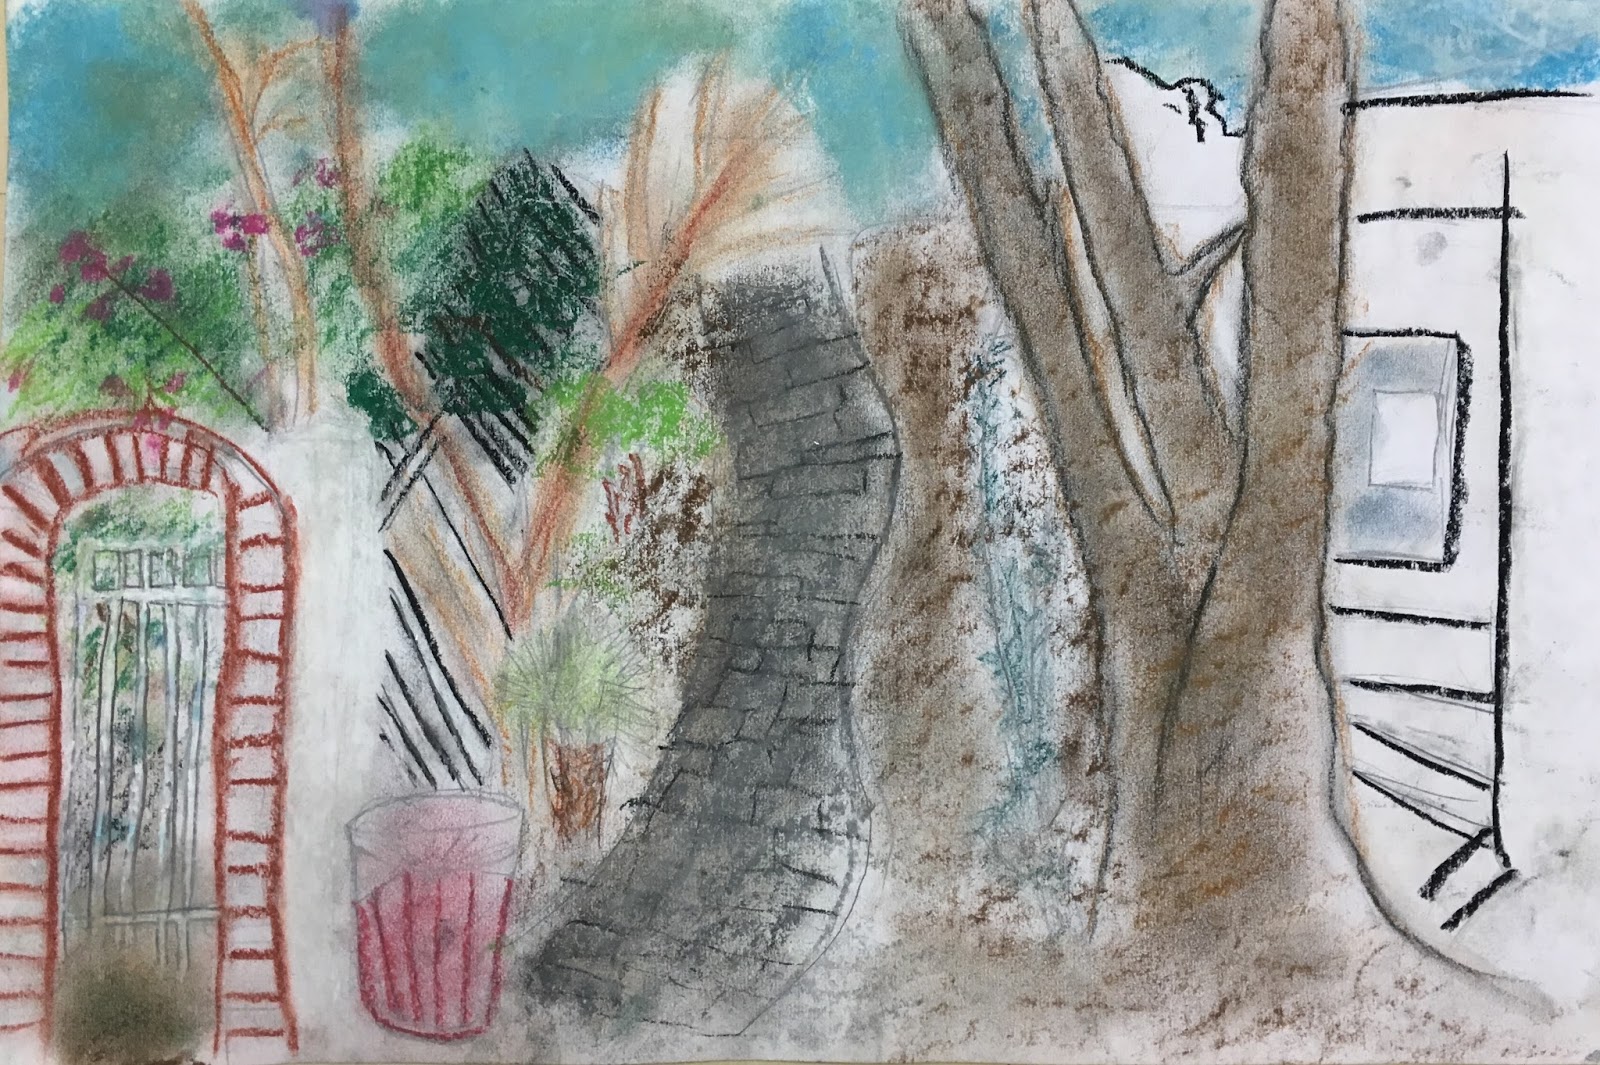
How gorgeous are those colors?! This project is a labor of love and really challenges students to observe and explore materials.

The first major project in the 4th grade curriculum is a landscape drawing unit. We start out by discussing genres of painting: portrait, still life, and landscape. Then we identify the parts of a landscape: foreground, middle ground, and background. Students view examples of landscapes from different cultures, particularly Western artist Vincent van Gogh and Chinese ink drawings. Students without training tend to render scenes and objects as flat and formless. By examining famous examples from art history, students begin to notice the techniques artists use to render spaces with dimension. Students quickly recognize three techniques to show perspective in a painting.

Vincent Van Gogh, Fishing Boats on the Beach at Saintes-Maries, June 1888, Van Gogh Museum, Amsterdam, Netherlands. (Wikipedia)
Technique #1: Overlapping. Take a look at van Gogh's boats and how only the first boat nearest to the viewer is entirely visible. The artist created perspective and space by hiding parts of the boats behind the first one to make the scene more realistic. Viewers feel like they would have to walk on the beach to see the rest of the boats.

Vincent Van Gogh, Olive Trees with Yellow Sky and Sun, 1889, Metropolitan Museum of Art, New York, USA. (Wikipedia)
Technique #2: Relative size. Place your hand in front of your face and notice its size. Pull your hand back and notice that it now appears smaller. Did your hand actually shrink? Of course not! Your eye sees your hand as smaller to tell your brain that your hand must be further away. Artists place objects that are relatively larger in the foreground, closer to the viewer. Objects that are further away are painted to be smaller. Van Gogh wasn't seeing new, smaller trees in the background, instead he painted them as they appeared to his eye - smaller because they were further away from where he was painting.

Dai Jin, Landscape in the Style of Yan Wengui, Early Ming Dynasty 1368-1644.
Technique #3: Atmospheric perspective. Difficult to pronounce but easy to see. Students will probably notice that objects in the foreground are much more detailed than the objects in the background. Artists may blur objects or use weather elements to suggest depth in their paintings.

Student landscape example
To start this project, students will select a landscape that has meaning to them - a favorite place, somewhere they visited, a home country, etc. Students should bring in a photograph of their chosen place and make sure it features the natural world with a foreground, middle ground, and background. It may be helpful for them and for you as a formative assessment to have students label or somehow identify these areas on their photograph. It is also helpful for students to find the horizon line or place where the flat/foreground elevation meets the vertical/background elevation. Finding this "line" centers students on their paper so they can judge relative size and make room for all of the details. 

Some students will quickly grasp how to incorporate perspective techniques into their drawings. Some students... will not. I was a little alarmed when a particular student couldn't seem to follow the verbal suggestions and demonstrations I did for him individually. Then I remembered my old friend - the critique. I showed the video Austin's Butterfly and modeled constructive criticism for students so they could provide peer feedback for a partner's rough draft sketch. Kids often speak to each other in a way that adults can't access while reinforcing their own understanding. Check out my post about using this video with students of any age - Critique: Using Student Feedback To Encourage Quality Work.

My students added color with chalk pastels and colored pencils. Make sure you demonstrate good practices with the chalk pastels before distributing them to students: dipping in water; applying a few strokes of color and blending; tapping extra dust into the trash rather than blowing onto themselves/their neighbor/your classroom. Colored pencils provide more control for small details - which belong in the... foreground. A colleague used oil pastels finished by blending with baby oil in her classes that produced excellent results. There are so many options here!

Last student example. This was done by a student just looking out the window of the classroom. Love!
Vocabulary
Genre
Landscape
Still Life
Portrait
Foreground
Middle Ground
Background
Perspective
Space
Vincent van Gogh
Overlapping
Relative Size
Atmospheric Perspective
Horizon Line

Do you have any tried and true chalk pastel techniques? With which grades do you explore landscape drawing and painting?

Artfully,
Catherine

Wednesday, October 19, 2016

Critique: Using Student Feedback to Encourage Quality Work

"Austin's Butterfly" produced by EL Education, also found here.

I can honestly say that this video is one of the best teaching tools I have ever used. It literally changed my (teaching) life and students are also deeply effected by its message. "Austin's Butterfly" steps students of any age through the powerful process of critique and shows them how this process dramatically changes the quality of their work. I recently showed this video to my 4th graders who are working on a realistic landscape drawing showing perspective. In years past I have also shown it to 5th graders working on animal and textile drawings, both using reference photographs. Even though Austin is a 1st grader, I make the point of mentioning to my classes that if a younger student's artwork can improve through a critique then an older student's work will definitely improve. 

If you would like to do a critique with students (of any age), there is a simple process to introduce this invaluable feedback technique.
  1. Show this video! EL Education's "Austin's Butterfly".
  2. Discuss the process that Austin and his classmates went through during the critique.
    1. Point out that the feedback Austin received was specific and given kindly.
    2. Feedback focused on one aspect at a time - shape and then pattern, which are both observable in the photograph Austin referenced.
  3. Demonstrate a critique with the whole class using your own artwork or a from volunteer.
    1. I always thank students for their bravery and have the class clap for each student to end their critique on a positive note.
  4. Release students to critique on their own. This can take different forms depending on time and the maturity of your students:
    1. Oral critique with a partner or small group
    2. Written critique*
  5. Students create a second draft or make changes to their work-in-progress.
  6. Repeat critique process as necessary. 
  7. Students reflect on their experience to improve the quality of their work by participating in the critique process.  
    1. Grab an editable reflection sheet here.
*Written Critique: For my fifth grade students, I asked each artist to lay out their draft, reference photo, and a blank paper. All students walked around and wrote their specific, kind suggestions for improvement on each artist's blank paper. I asked each student to visit a minimum of 5 other artworks to write their feedback. Most students gladly visited more and only time prevented them from viewing all of the artworks to give feedback. Afterward, we came back together as a group to display each student's the photo and draft then read through the comments. After the whole-class critique, this activity is like independent practice so I wanted to do quality-control on the comments and make sure students were understanding how to give appropriate feedback.
 
Here are a few of my favorite moments from the video that have improved my own teaching practice:

"Looking like a scientist"

 Artists use skills from many other disciplines and close observation helps masters in every field. When students rush through their work, forget important or interesting details, and can't get their subject to look just right it is most often because they aren't looking like a scientist. I ask them to go back to use their scientist eyes to take their subject from the impression in their mind and create a stronger likeness to real life that elevates their work.

  "Good start"

What do you think? One of the most loaded questions in the art room because it usually comes when students have hit a creative wall and are looking for permission to be done. To encourage them in continuing, I will tell them that they have a good start and then give a suggestion for moving beyond the stumbling block. If your students are consistently struggling to find the finish line, consider the (general) qualities of good artwork, or what I like to call craftsmanship. Make your students aware of expectations and give them the tools to reflect on their progress. I discuss this in more detail in my post about grading, which you can find here.

"More drafts to make it better"

I am a firm believer in the power of a sketchbook. I also believe in planning, practicing, and perfecting before starting a final project. At the beginning of each project, I have a discussion with my students about how our materials are precious. Each student gets a single piece of paper for their final project and I expect them to persevere through the challenges of finishing their project on that paper. So first, they must make a rough draft to work out their ideas, uncover snags in their plan, and erase to their heart's content. The final draft flows more smoothly and there are fewer frustrations when students have worked out the kinks in a low-pressure format like their sketchbook. 

Are there any videos or resources you share with students to help them reflect on their work? Have you ever had an "aha!" moment in teaching and what inspired it?

Artfully,
Catherine